> ## Documentation Index
> Fetch the complete documentation index at: https://docs.usefulsol.fun/llms.txt
> Use this file to discover all available pages before exploring further.
# Wallet, trading & sniping
> Available on the paid TRADER KIT plan.
## Connect your wallet
Open the **TRADING** tab → **Wallet**:
Make a new wallet just for trading and paste its private key.
Paste a second wallet of yours — funds are swept there in an emergency evacuation.
Keep only your trading amount on the trading wallet.
Once connected you see your balances. **remove** deletes the key and cancels your limit orders.
## Presets & settings
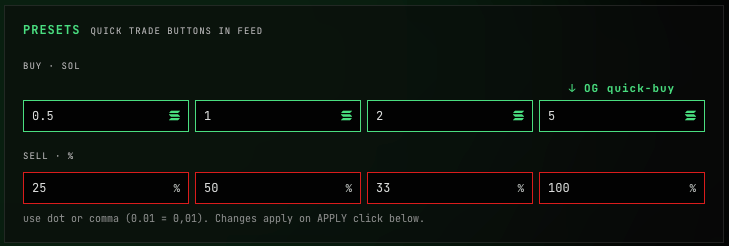
Set up your quick **buy** (in SOL) and **sell** (in % of position) buttons — they appear in the feed and the panel. You also set the quick-buy amount for the **OG extension**, plus slippage and priority fee. Everything is saved with **APPLY**.
## Trading
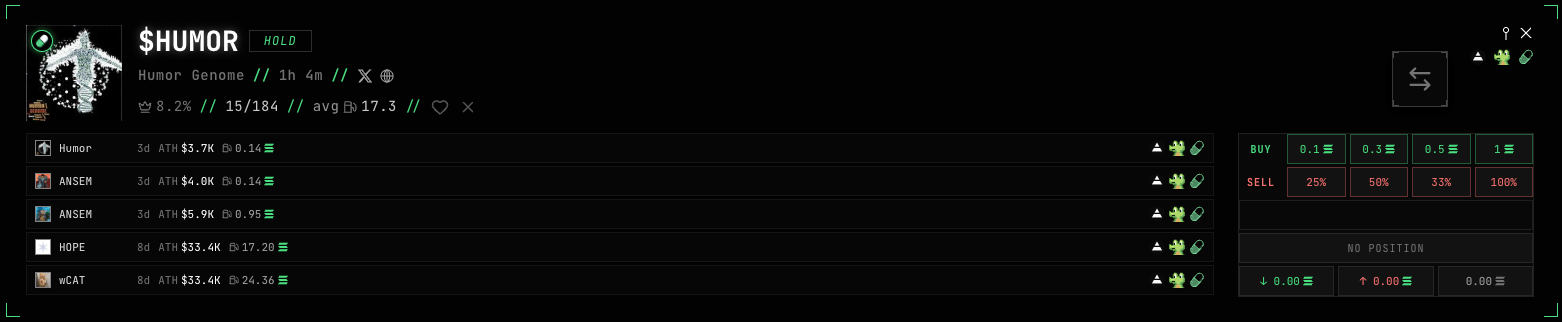
**From the feed (inline):** tap a preset on the card — the status shows live (`submitting → sent → confirmed/failed`), with your position and PnL below.
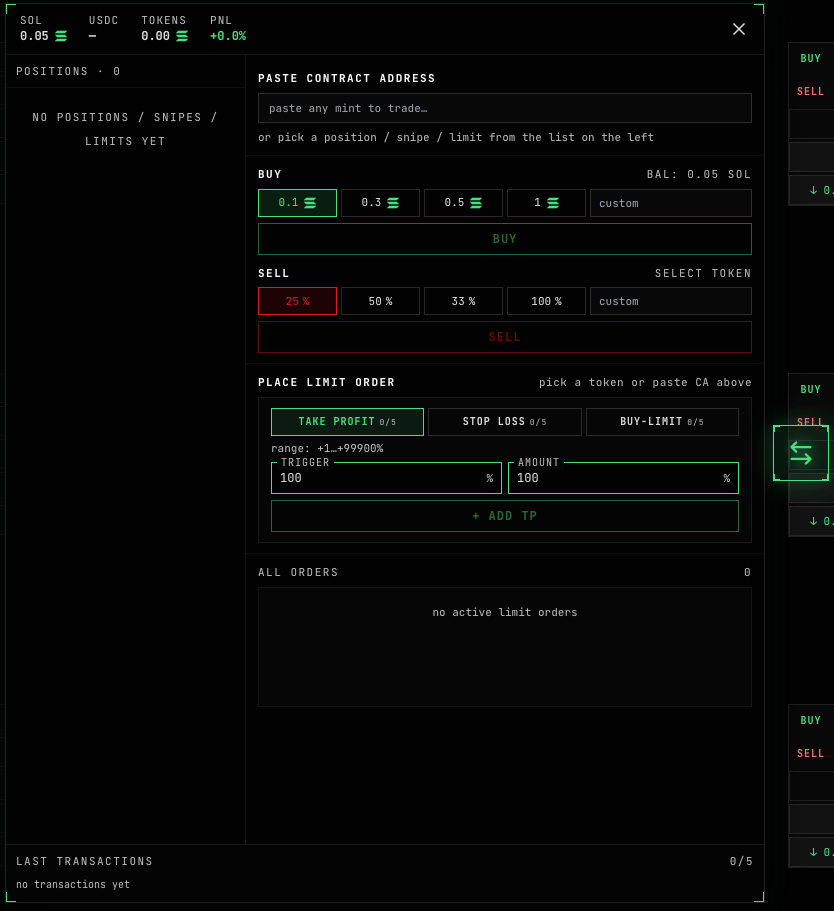
**The floating trade panel** — for detailed trading:
* At the top — SOL, USDC, token value and portfolio PnL%.
* On the left — the positions list (real, pending snipes, limit-only).
* Paste a token address (CA) to trade any token, or pick from the list.
* **BUY** (in SOL) and **SELL** (in %) forms — presets or a custom amount.
* At the bottom — the last 5 transactions with status and a Solscan link.
## Limit orders
Placed in the trade panel; they fire automatically. Up to **5 orders of each type** per token:
| Type | What it does |
| --------------- | -------------------------------------------------------------- |
| **Take Profit** | Sell a % of the position when price is up by your +% |
| **Stop Loss** | Sell a % when price is down by your −% |
| **BUY-LIMIT** | Buy more when the market cap drops by −% below the current one |
**Take Profit** and **Stop Loss** work today. **BUY-LIMIT** is in the UI, but execution is still in progress.
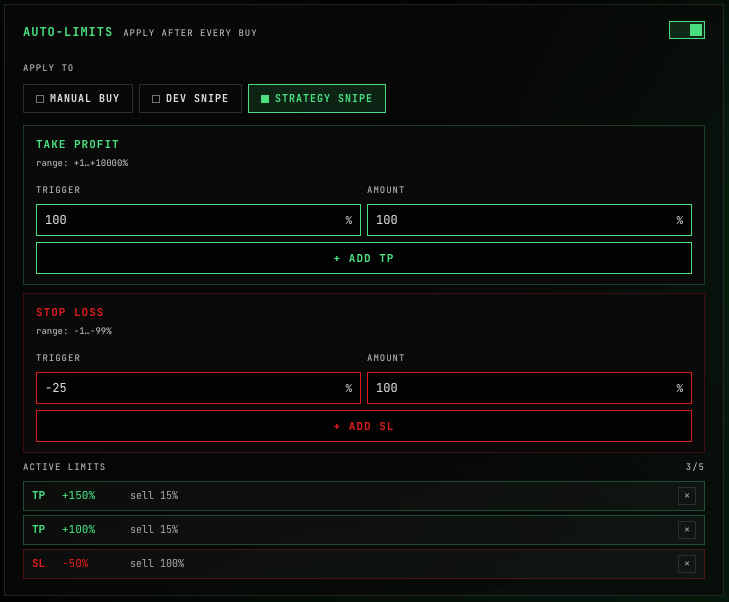
**Auto-limits** (in settings): the same **Take Profit and Stop Loss** placed automatically after every buy. You choose what they apply to — manual buy / dev snipe / strategy snipe. Up to 5 total, saved with APPLY.
## Sniping
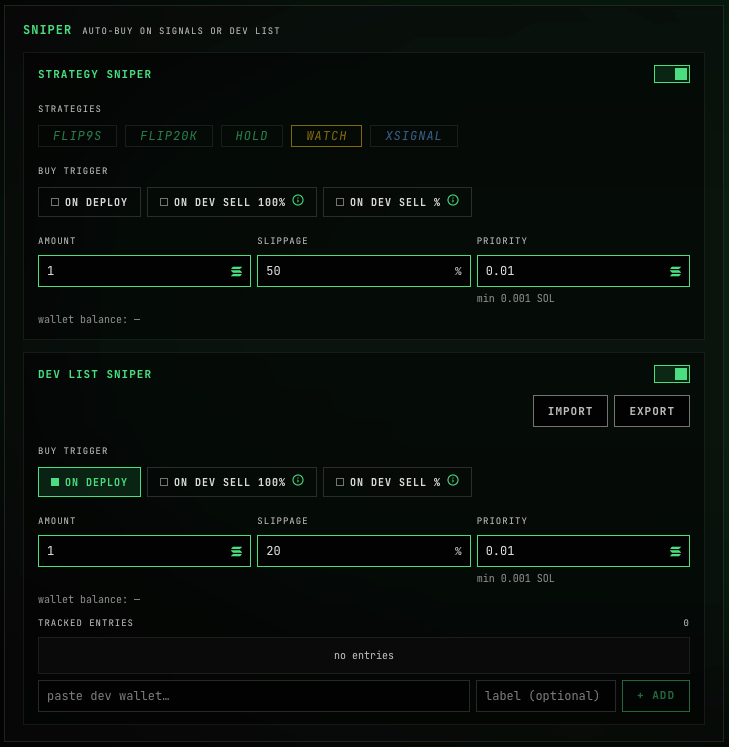
The sniper buys a token for you the moment a condition is met. Both snipers are **off by default**.
* **Strategy Sniper** — auto-buy on a signal from the strategies you pick (FLIP9s / FLIP20k / HOLD / WATCH / XSIGNAL).
* **Dev List Sniper** — auto-buy from your own list of dev wallets (import/export as text).
For either one you set a **trigger** (when to buy) and **amounts**.
Trigger:
* **on deploy** — on the token's launch
* **on dev sell 100%** — when the dev fully exits (sells everything)
* **on dev sell ≥%** — when, on their **first** sell, the dev dumps more than your threshold
Amounts: amount (SOL), slippage (%) and priority (SOL).
What USEFUL adds on top of Axiom, GMGN and Terminal.